

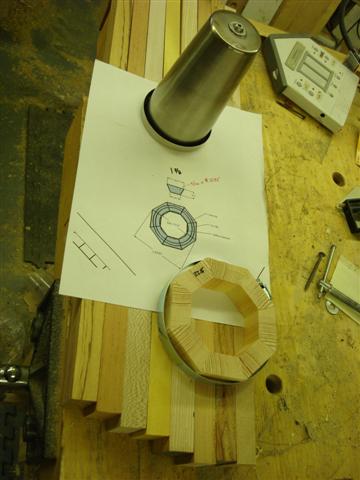
The winter issue of American Woodturner featured the turning of a travel mug. I bought a mug insert some time ago from WoodCraft and it was sitting on my project bench waiting for motivation. Since I needed a Christmas gift for a friend and I wanted to try turning a staved vessel using fixed angle router bits, I set about planning this project.
Using SketchUp I modeled the stave angles and dimensions to insure the wall thickness accounted for the taper in the mug insert. If you want a copy of the model register and leave a comment at the end of this post.

I started by making a SketchUp model of the mugs form to get all the angles correct and insure that I accounted for the mugs taper. The mug is larger at the top than the bottom and it is important that there is enough wall material to allow a taper to be turned without cutting through the walls. The model allowed me to create and fit the stave’s just like the real thing. I followed with a real prototype, making a cross sectional glue up by cutting and routing one stave and then slicing it into small sections. This step verified that my cutting and routing setup would produce closed glue lines.
Summary:
The project required an interesting mix of wood turning and woodworking skills. The router method of creating angles yielded perfect glue lines but was a bit challenging to set up. I don’t know if this is easier than setting up a sled on the table saw or not. The technique for rolling the glue up on wax paper outlined in American Woodturner works much better than my manual method. The metal mug inserts are not all exactly round and the dimensions (especially the lip) vary slightly so don’t expect to make these in batches. Each insert needs to be turned with its own hollow form.
I was very satisfied with the outcome!
The detailed turning process is below.
Donnie
| I set up the saw to cut the stave’s accurately by using a accurately cut template to set the fence. Precision is critical to get a good glue-up of the stave’s. | 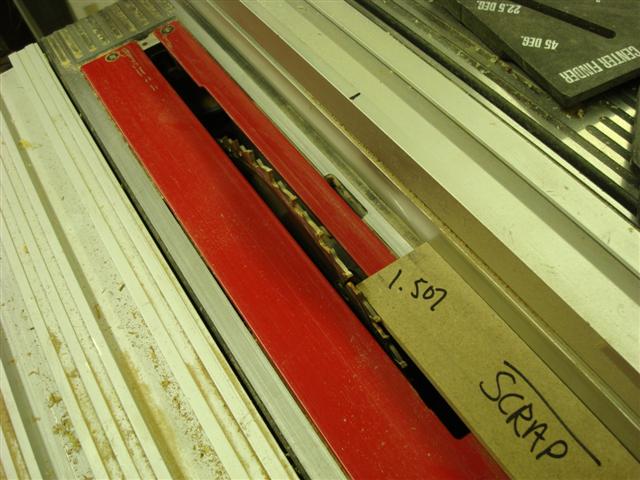  |
| After making a sanding sled I put the stave’s through the thickness sander to insure that they were all uniform size and finish. |   The Inglorious Bastards trailer The Inglorious Bastards trailer |
| Next I set up the router with my 22.5 degree bit and routed the two angles. The setup of the router height was critical. It took a number of passes with scrap wood to get it right. Make sure you use a feather board to hold the stave consistently up against the bit. The key is to get the top of the bit to line up and cut exactly at the top of the stave. |   |
| The form was then glued up with Gorilla glue and a couple of pipe clamps. Use wax paper under the clamps and on work surfaces to make clean up easier. Wear latex gloves to keep from having to remove skin to clean up your hands. Don’t forget to wet the mating surfaces before you apply the glue. Polyurethane glues bond better with moisture. After an overnight wait the clamps are removed and the form is mounted between cone centers, then turned round. |  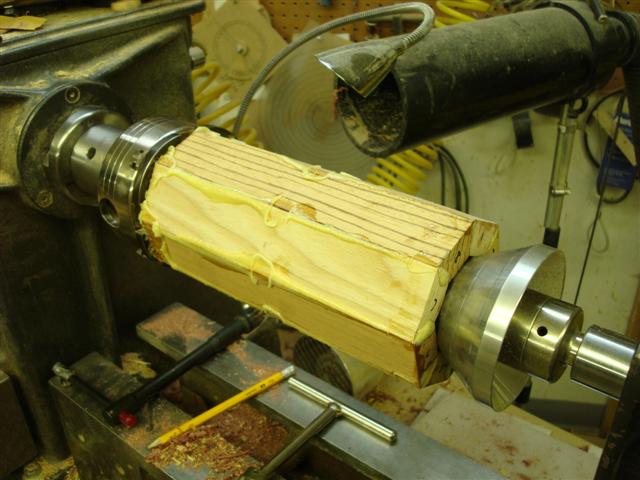 |
| The plug was made from a piece of oak that was glued to a waste block and turned to size in a separate step. The glue block was left on the plug and served as a mating surface for the tail stock live center. After drying overnight the pugs waste block was parted off leaving a closed end that was ready to re-chuck for hollowing. I used a cone center to align the mug and then tightened the chuck. |   |
| The hollowing process is one of trial and error to get the insert to fit . I used a hook tool and termite tool, both worked well.
I made a template that matched the OD of the insert and used that to get the basic internal shape, depth and taper. |
 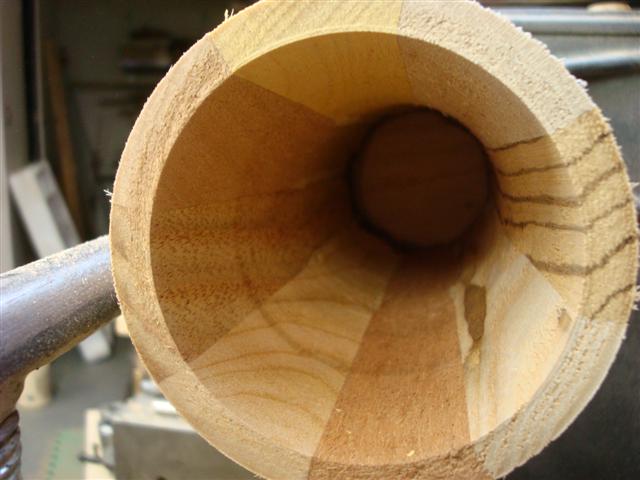 |
| Then the insert was fitted by hand.Wipe chalk on the mug insert, push it into the form and rotate. Pull it out and look for the chalk that was transfered to the inner wall, then cut those areas back. I got this tip from American Woodturners article. |   |
| Part off excess material until the form is the correct length. Then cut a rabbit at the edge of the form to receive the lip of the insert. Once the lip and the inner profile is cut install the insert and bring up the tail stock with the cone center installed. Cut the outer profile of the mug with the insert installed, this method insures that the outer profile exactly matches the inserts lip. Mark the orientation of the insert in the form so that you can get it back exactly in the same place. I found that every insert is slightly different and not always perfectly round. |  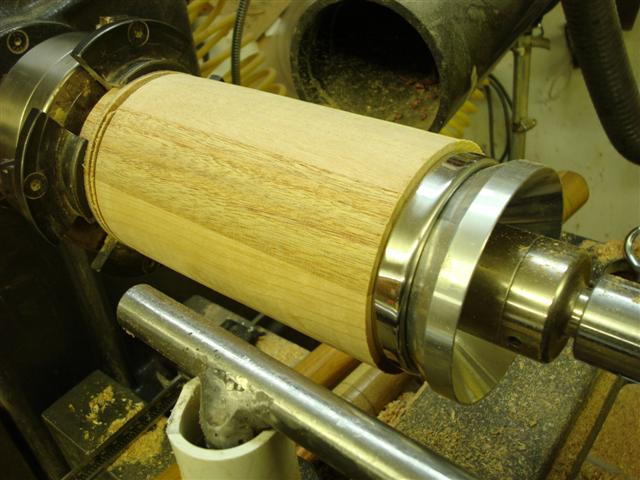 |
| I applied the finish while the piece was on the lathe. Then, using my shop made laser depth finder I checked the location of the bottom so that I would not go through it when I parted it from the lathe. | 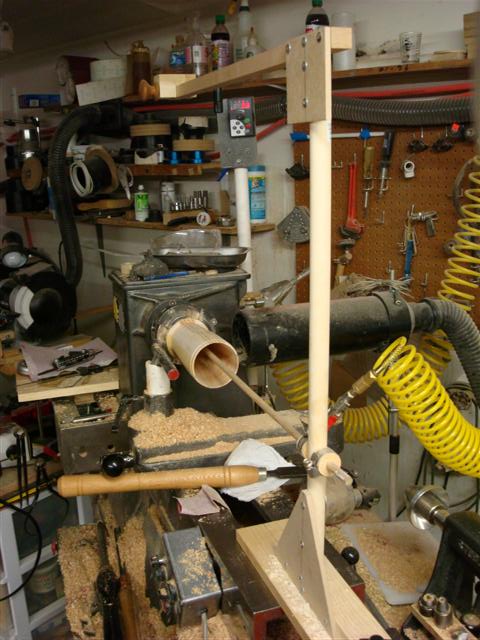 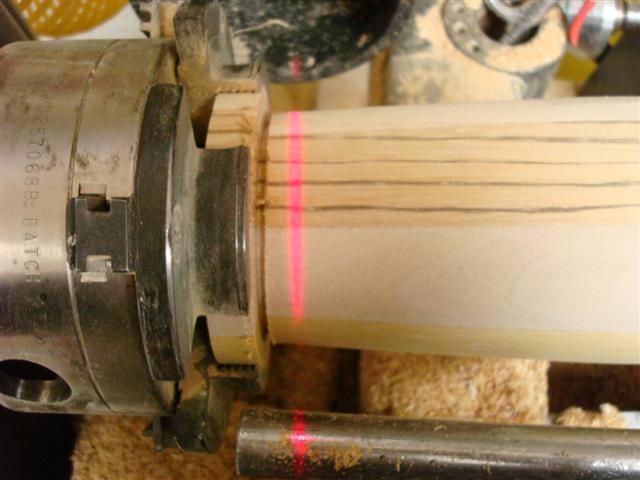 |
| The completed hollowed form looks like this. I finished it with several coats of satin polyurethane so that it could withstand spills and cleaning.Note: instructions for turning this mug are also available from Woodcraft. I found that both the techniques from this set of instructions and the article in American Woodturner were helpful. | 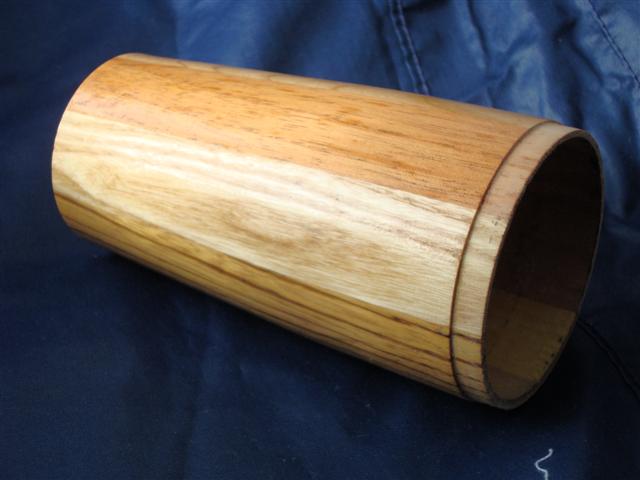  |
I have been a frequent visitor of this blog for some time now, so I thought it would be a good idea to leave you with my thanks.
Regards,
Jim Mirkalami
Thanks Jim. If I can ever be of help don’t hesitate to email or comment. Especially if there is something your would like to see on this blog!
Thanks for posting all of this information. I’ll be checking back regularly, and probably contributing.
Where do you get the mug inserts. I’ve searched without much luck
You can get the mugs at Woodcraft.
There is an alternate source in the Winter issue of American Woodturner.
Grate idea can you tell my where you found the inserts I have made one but I had to tack apart on of my travel mugs thanks for the help
You can get mugs at:
Craft supplies:
http://www.woodturnerscatalog.com/store/Projects___Kitchenware___Travel_Mug___travel_mug?Args=
Woodcraft:
http://www.woodcraft.com/family.aspx?familyid=20964
Hi, can anyone tell me where I can buy the finished product? michelle_gale@sbcglobal.net
Thanks for the information. Now i know what material to be use on making Sketch Up model of the mugs.
Pingback: Travel mug advice - Woodwork Forums
I sometimes will take special orders. Tried to email you back with no response.