Beehive progess report

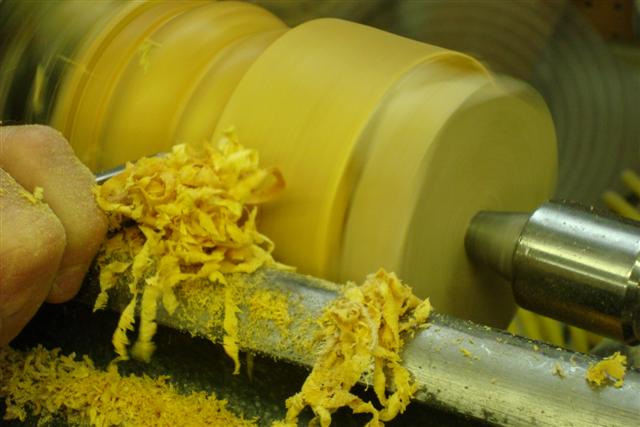
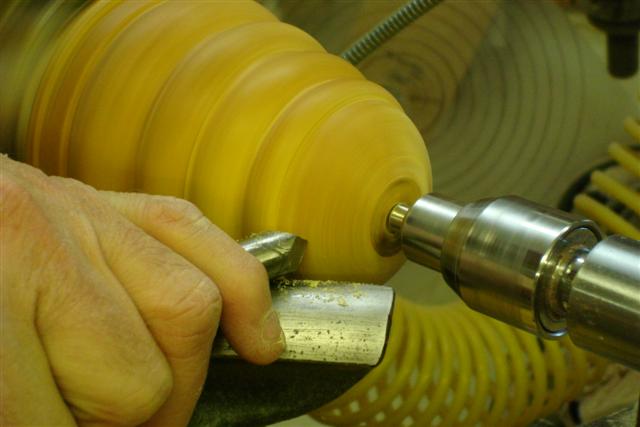
I worked most of last weekend on honey-do’s but I did get to the Beehive.This week will be spent on the bee itself. aug-07-092-small.jpg

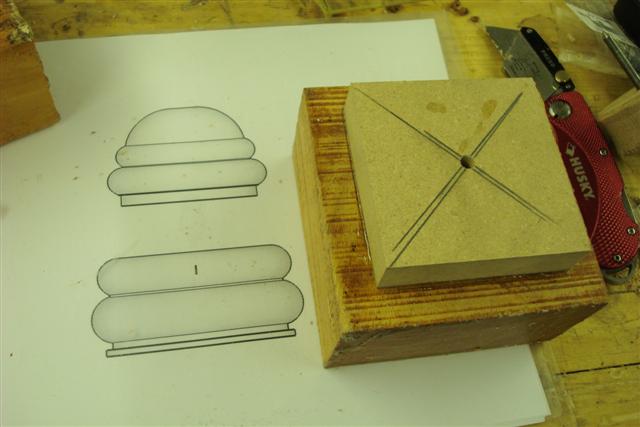
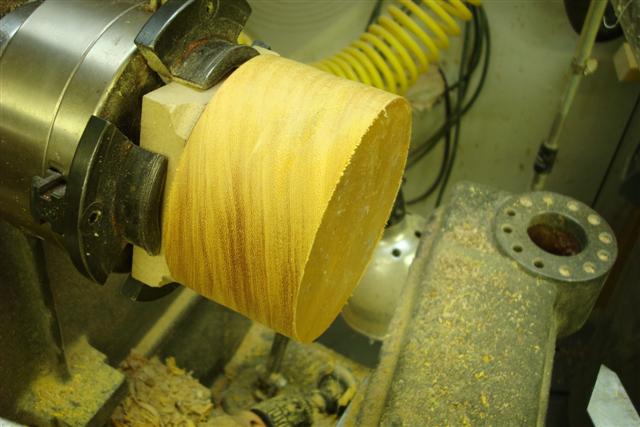
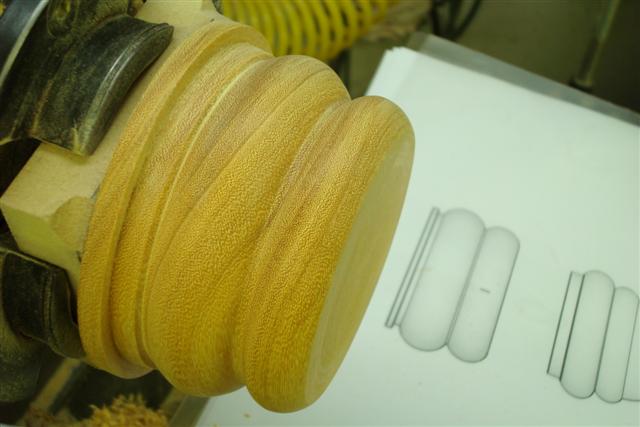
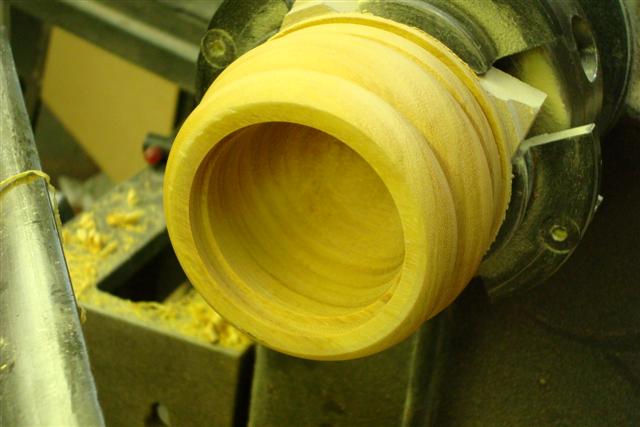
Its always fun when you model something on a computer and then you see it evolve in real life. I now use the Donny Virtual Lathe to start and plan many of my projects. The evolution of the beehive from modeling to actual turning is detailed below. Click any of the pictures to enlarge them.


I use the model printed in full scale as the story stick. From this picture I translate dimensions with my caliper to the turned piece. Precise dimensions are not important but this helps me to keep perspective and proportion throughout the turning process. Beehive story stick
The model was designed for turning from a couple of 2 inch thick 4×4 blanks of Osage Orange. I find this to be one of the advantages of modeling. I can insure my design fits in the blanks envelope while retaining the design aesthetics. Many times I have gone to the lathe with and idea and by the time I fit it to the material I lost the design proportions. aug-07-077-small.jpg
  • Cut a square piece of backing material (MDF) that will fit diagonally into your chuck (3×3).
  • Mark the mount and the blank with diagonals to locate the center of each.
  • Drill a hole in the mount and using a nail align the mount to the center of the blank and draw the outline of the mount on the blank.
  • Glue the blanks with CA on the center of the mount using the outline as a guide.
  • The upper picture shows the blank mounted in the chuck and turned round

This method of mounting blanks is simple because no turning is necessary. I make up a dozen of these backers squares ahead of time.

aug-07-078-small.jpg
The bottoms blank mounted in the chuck by the backing material and turned round. Osage Orange is very hard and cutting cross the grain requires sharp tools and patience. aug-07-080-small.jpg
The bottom of the beehive is turned to match the story stick. It would have been very difficult to get the proportions right if I was to do this freehand and without a story stick, since the bottom is turned separate from the top. Beehive peice 1
Hollowing the bottom with a termite tool. I haven’t used this tool much but I’m starting to like it. Its cuts hard cross grain smoother than anything else I have tried. Beehive
The completed bottom with the mortise to accept the top. Beehive
The top was mounted to a backer and its mortise was turned along with its initial hollowing. I used a second chuck for this because I didn’t want to remove the bottom from its chuck and loose its centering. This step requires careful turning and fitting of the tenon into the bottom until the top and bottom have a tight fit. Beehive
The top is now mated with the bottom on the lathe between centers and the shape of the top is turned. Beehive
Gamer dvd
The top is then re-mounted in a chuck and the final hollowing is completed. At this point the top of the beehive still needs final turning. Beehive
The top is inserted in the chucked bottom and they are mounted between centers. The tail stock is fitted with a blunt live center so as not to wear a hole in the top. The domed top is then turned. Beehive
A jam chuck is made that fits in the chuck jaws. Beehive
The top is then inserted and taped into the jam chuck for finish turning and sanding of the inside. Beehive
The final beehive showing its features. Beehive

Slither psp

Donny png

This entry was posted in Hollow Forms. Bookmark the permalink. Post a comment or leave a trackback: Trackback URL.

One Comment

  1. mary
    Posted November 2, 2007 at 3:37 pm | Permalink

    Donnie:

    You have worked so hard! It looks totally beautiful. It is so touching that you’re working so hard on a project with me in mind… I guess you really are trying to make up for rolling me up in the carpet!! haha. Seriously, I am very touched….What a great big bro you are…..

    lovvvvvvvve

    mary

2 Trackbacks

  1. [...] finished beehive illustrates how a difficult design challenge can be modeled and then turned with realistic [...]

  2. [...] finally completed the beehive project. If you recall I modeled this project in SketchUp using some real world pictures of hives, and then [...]

Post a Comment

Your email is never published nor shared. Required fields are marked *

*
*

You may use these HTML tags and attributes: <a href="" title=""> <abbr title=""> <acronym title=""> <b> <blockquote cite=""> <cite> <code> <del datetime=""> <em> <i> <q cite=""> <strike> <strong>